Thursday, August 25, 2011

Mooli Paratha

Mooli Paratha is Indian Bread stuffed with White raddish. All Parathas can be filled with our own style masalas. There is no specific masala recipe for them. So we can adopt our recipes and try each of them.
 You need
White Radish (Muli/Daikon) – 3 medium size, peeled and shredded
Salt – to taste
Coriander – 5 sprigs, finely chopped
Green Chilies – 3-4 finely chopped
Ajwain Seeds – 1/4 tsp
For the dough:
Chapati Flour – 1 1/2 cups
Salt – 1/4 tsp
Oil – 1 Tbsp
Warm Water – 1/2 cup + 2 Tbsp
Extra Flour – for dusting
Oil – for pan frying
Mix Salt and Oil with Flour and add warm Water. Knead to form semi-firm dough. Coat dough with few drops of Oil, cover and set aside for sometime.
Sprinkle shredded Radish with Salt, mix well and set aside for 10 mins. The salt helps to pull the water from the radish. Although, the salt pulls out water, we need to squeeze out the water from raddish and discard them.

After that, add the chopped cilantro leaves, green chillies and Ajwain seeds. Mix well. Now divide the dough in 8 or 10 balls and divide the radish also in 8 or 10 balls.
Roll out one dough into a small circle using dry flour to prevent sticking. (Hint: While you roll out, make sure that the rolled dough is slightly thicker in the center. If so you can do like we did for gobi Paratha or Aloo Paratha. Or else we can do by below method).
Place one portion of Radish mixture in the center of the disc. Wrap the dough around the Radish mixture to form a ball. Dip the ball into dry flour once again and roll out the paratha.
Shake off any excess dry flour and place the paratha on a hot skillet or tava.
I do not have a great lighting in my kitchen. You can see that in my pictures. Need to add some special lights for taking pictures.
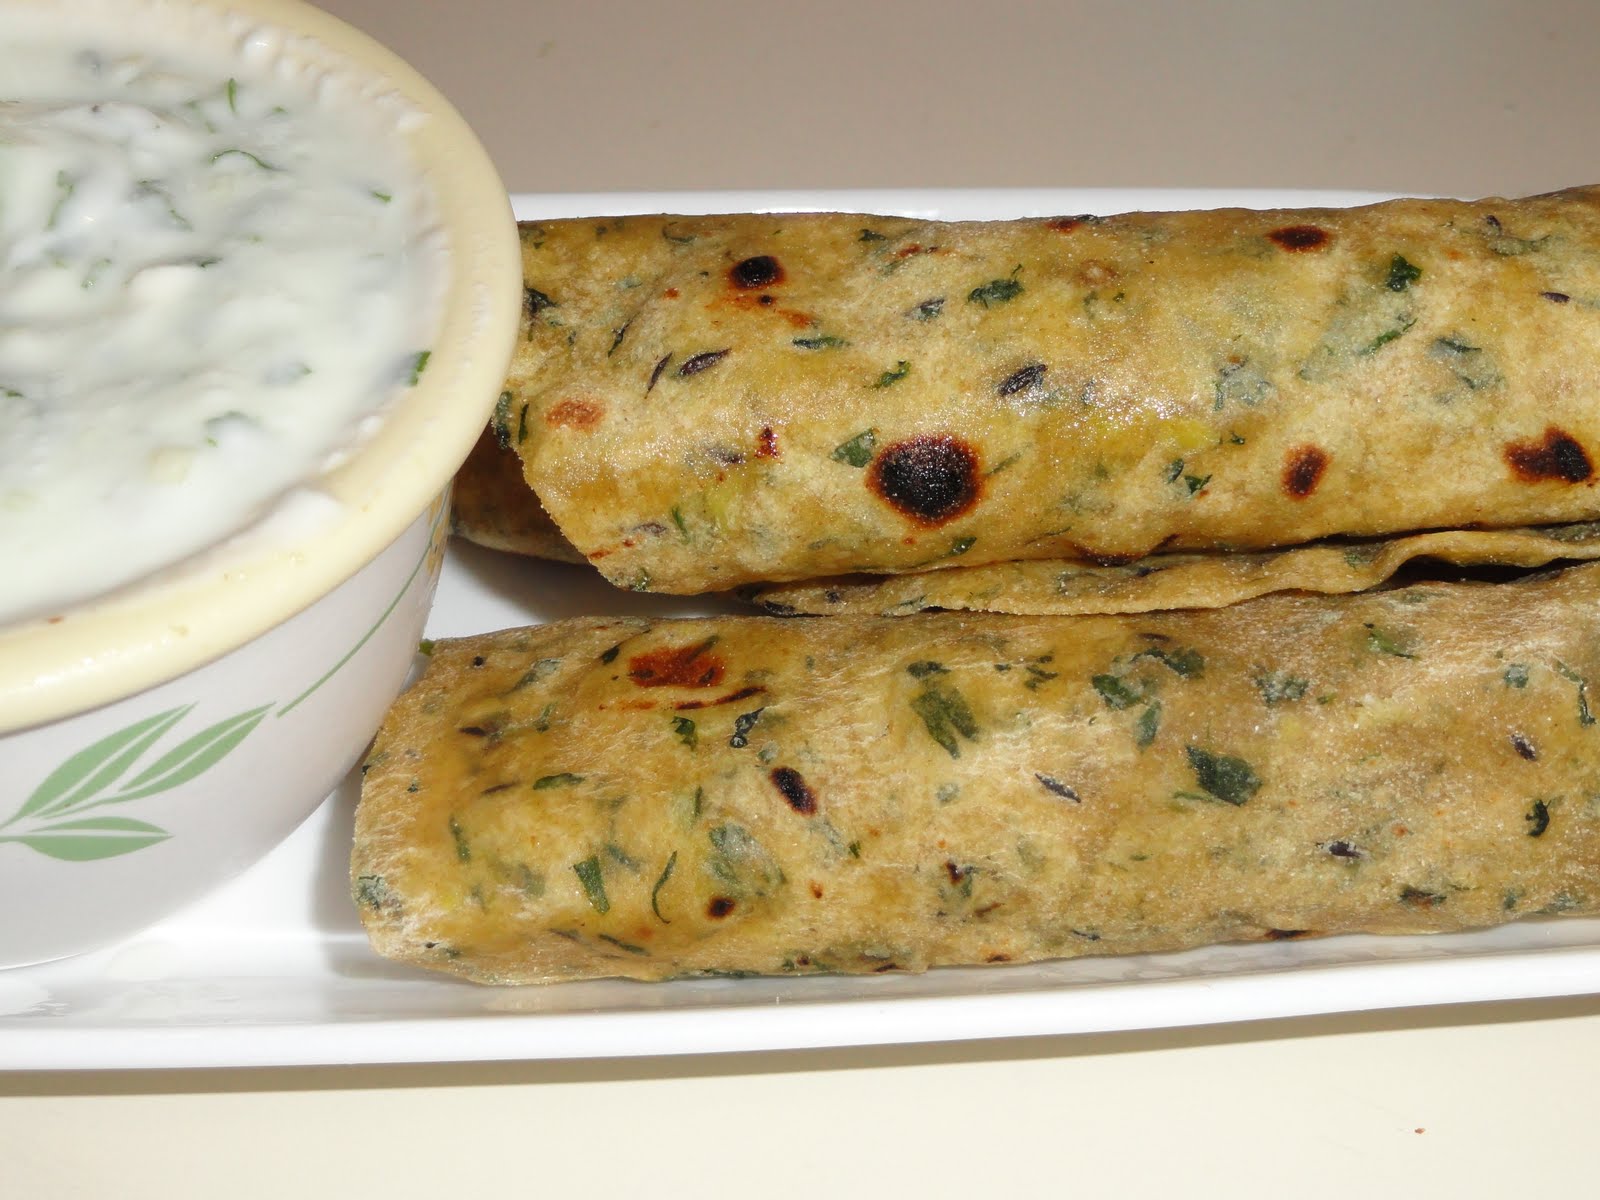
When bubbles appear, flip the paratha over. Wait approx 30 – 40 secs and spread a little oil on the top. Flip the paratha back to the other side and gently press to cook. Spread a little oil onto this side. Continue to flip and press until the appearance of raw dough has gone. Store paratha in a covered or insulated container until ready to serve. Repeat with remaining dough. Serve paratha hot with pickle, yogurt or butter.
I prepared Tomato thokku to go along with this. It was really yummy and quite spicy too! Sundar wanted to have more spicy dish, so I opted to have thokku instead of yoghurt.

Some Facts about Radish
Radish, the well known part of your salad, is a root crop, pungent or sweet in taste with a lot of juice. Radishes can be white, red, purple or black, long cylindrical or round in shape. They are eaten raw, cooked or pickled.
1. Radish is very good for the liver and the stomach and it is a very good detoxifier too, that is, it purifies blood.
2. Radish is very rich in roughage, i.e. indigestible carbohydrates. This facilitates digestion, retains water, cures constipation (one of the main causes for piles) and thus gives relief in piles. Being a very good detoxifier, it helps heal up piles fast. Its juice also soothes the digestive and excretory system.
3. Radishes are very filling, i.e. fills your stomach and satisfies your hunger easily without giving you many calories, as they are low in digestible carbohydrates, high in roughage and contain a lot of water. It is a very good dietary option for those determined to lose weight.
4. Being a very good detoxifier and rich in vitamin-C, folic and anthocyanins, radish helps cure many types of cancer, particularly those of colon, kidney, intestines, stomach and oral cancer.
5. Vitamin-C, phosphorus, zinc and some members of vitamin-B complex, which are present in radish, are good for skin. Smashed raw radish is a very good cleanser and serves as a very efficient face pack.
Many more benefits are there. 
6. Apart from above benefits, radish is a good appetizer, mouth and breathe freshener, laxative, regulates metabolism, improves blood circulation, is a good treatment for headache, acidity, constipation, nausea, obesity, sore throat, whooping cough, gastric problems, gallbladder stones, dyspepsia etc.


Wednesday, August 24, 2011

Methi Pulao with raita

Methi is the most used herb in our house now. Coriander is my most favorite herb in all that I cook. Although Coriander is frequently used in our house, I still try to make something interesting from Methi leaves, I came across Methi Pulao in a cook book and I wanted to try.
This is a very simple recipe, you can try when there is little time to plan for a pulao. Or when there are unexpected guest.

You need
Basmati Rice - 1 Cup
Methi (fenugreek) leaves - 1 ½ cups
Ginger Garlic paste - 2 tsp
Onions, thinly sliced - 2
Tomatoes cubed - 3
fresh/frozen peas - ½ cup
Corriander powder - 2 tbsp
Cumin powder - 1 tbsp
Red chilli powder - 2tsp
Kasuri Methi (Dried Fenugreek),crushed - 2 tsp
Salt to taste
Lemon juice - 2 tsp
Oil - ¼ Cup
Water - 1 ½ cups


Heat oil in a skillet. Add the thinly sliced onions and saute till transparent and soft. Add the ginger garlic paste and saute for a minute. Now add the washed methi leaves and saute for 3-4 minutes, till the methi leaves are fragrant. Once the methi leaves are done, add the tomatoes, and cook till soft. Add the coriander, cumin and chilli powders, fry for a minute. Have this in the cooker, and add water and close the lid. Increase heat to high and when the steam begins to rise, lower heat and open lid slowly. Add the washed Basmati rice. Stir in lemon juice, kasuri methi and salt to taste. Close with lid and turn heat to high. When the steam begins to rise, place weight on the lid and lower heat. Cook for 10 minutes and then turn off heat. Mix well before serving hot with a cucumber raitha.

This was prepared with the intention to be simple and for less time consuming. Otherwise, you can add carrot and beans in less quantities and adjust the spices accordingly. I prefer to eat the methi pulao with just the taste of methi leaves.

Tuesday, August 23, 2011

Methi chutney

Methi has become essential on a weekly basis in our home. Methi is used in some form or other. And I love fresh Methi leaves. I use it in paratha, rice, and now in chutney.
These go great with Parathas. Also we have have them with our idlis, or dosa.

You need
fresh methi leaves (tightly packed) - 3 cups
sesame seeds - 1/4 cup
red chillies - 5 or more
tamarind juice - 2 tsp
urad dal - 1/2 tsp
Salt as required
Oil to saute

In a skillet heat the oil. Add the chillies and toast them. Then add the sesame seeds and the dhal. And saute until the dhal is golden brown. Transfer this to the mixer. Saute the methi leaves seperately with 1 tsp of oil in low flame. Transfer this to the mixer. Allow it to cool and then grind. The leaves have water content, so do not add excess water.

Out of haste do not grind when it is hot, this will show the bitter taste of the leaves more. I tend to do this usually. I like to have them for my parathas.

Aloo Paratha

Aloo Paratha is very easy to prepare that no explanation is required. And yes, it is very tasty to eat. Nobody needs to have any skill to prepare a Paratha.
There are different ways to prepare the paratha and lots of different recipes to prepare the filling. Everything tastes great. This is just one method to prepare the aloo masala, you can change to suit your taste.

You need
Wheat Flour - 2 cups
oil - 2tsp
Warm water
Salt - 1/2 tsp

For the filling
Potatos boiled and mashed - 4
Lemon juice - 1/2 tsp
Onion - 1 finely chopped
Carrot - 1 small grated
Red chilli powder - 1tsp
Garam masala powder - 1/4 tsp
Cumin powder - 1/2 tsp
Turmeric powder - 1/4 tsp
Amchur powder - 1/4 tsp
Ginger Garlic paste - 1 tsp
finely chopped coriander - 3 tsp
Oil - 3 tsp

Take wheat flour in a medium bowl. Add salt and oil. Stir to combine. Now slowly add warm water to make a soft smooth dough. The dough should not be sticky, so add water only as needed. Cover and let sit for 30 minutes to an hour. 


Knead the dough and divide into golf sized balls. Roll out each ball into a 3 inch round. Place 2 tbsps of the filling, in the centre of the rolled dough. 
Bring up sides of the round over the filling to make a closed bag. Cover with the sides of the circle like below.
Roll out gently into a 6-inch round. You can add flour for rolling.
 Heat a pan and toast the paratha on both sides, on medium heat. First toast on one side then go to the other side. Use ghee to roast if required.
Serve hot with choice of pickle and curd.

Friday, August 19, 2011

Gobi Paratha

I love parathas, what ever be the filling. Rather than the routine rotis, I prefer to have parathas. It is very easy that they can be had with curd or pickle.
When my mom was with me last time, I never tried to be in kitchen. And now I never let her in, and love to cook all that I can for her. My mom is a great lover of Gobis and she enjoys all dishes made out of it! So I thought I would try Gobi Parathas. When I was looking for recipes on cookbooks, I came across some recipes which is layered parathas. Somehow I dint want to try that now, rather I adopted the traditional method to prepare the Parathas. I would surely try the layered one ssometime later.


You need:

Cauliflower - 1 cup minced
Onion - 1/4 cup, minced
Garam masala - 1 tsp
Cumin / jeera - 1/2 tsp
Red chilli powder - 1/2 - 1 tsp
Ginger garlic paste - 1/2 tsp
Oil to saute
Salt - to taste

Heat oil in a skillet, add the cumin powder or the seeds. Once cumin splutters, add the onion and saute unitl the onions are golden brown. Now add the ginger garlic paste (i nalways use fresh minced ginger and garlic). Next add the garam masala, chilli powder and salt to taste. Mix well and then add the miced cauliflower. Cook this on low flame with covered for about 10 mins. You can sprinkle very little water. There should not be too much of water as it will make the roti mushy.
It should like this -
You can add some paneer for an added taste. And finally add finely chopped coriander leaves.


We need to make the dough. We will need 4-5 cups atta/whole wheat flour, salt and a little warm water. Mix in the salt and add water little by little to the atta to make a firm dough. Let it rest for about 30 minutes.
Make lime-sized balls. While you make the dough into small balls, make the gobi masala also into small balls so that they should be 1/2 the size of the dough balls. And then roll out each dough to a circle. Now fill in the gobi masala and close the dough and press it flat. Then again roll out to a circle.

Little of the masala might come out, it is ok. It often comes out for me. Sometimes I tend to keep more of the masala and it muddles so badly, oops! It happens every time I prepare Parathas, and still I love to prepare the way they come for me.
Now you can cook them on hot griddle. First cook one side, then go to other side. Make sure you take them when they are golden brown. Don't forget to add a pickle or little curd.
 I made methi chutney to dip in the parathas. And they were just great!

Wednesday, August 17, 2011

Masala Dosa

A very simple recipe for any day when you would like to have something other than the routine dosa and the chutney. Some people stay away from Masala dosa as they have the potato filling as I do. But I tell you, it does not make you feel heavy as they are prepared at home. Some how we can never eat more than one or couple of masala dosas from hotel. And it is not like that when it is prepared at home.

You need

For the filling
Potato, medium sized - 4 nos
Onion, medium sized long thinly sliced - 1 to 2
Small green chilies, just split them at the center - 4-8 nos
Turmeric - 1/4 tsp
Salt to taste
Mustard - 1/4 tsp
Urad dal (black gram) - 1 tsp
Chana dal (yellow split peas) - 1 tsp
Curry leaves - 2 bunch
Coriander leaves or Cilantro - 2 springs
Ghee - 1 tbsp
Oil to saute

Heat oil in a skillet. Add mustard and allow it to sizzle. Now add urad and channa dhal and saute until golden color. Now add the chopped curry leaves and then the chillies. Add the onions and saute for about 2 -3 mins. Now add the mashed potato to it, with salt and turmeric. To the mixture add little water and cook until the masala is done. It should not be in gravy form. Finally add the chopped cilantro and a tsp of ghee.

To prepare Dosa
I always use idli batter to prepare dosa with a little addition of water so it is not as thick as the idli batter. And it comes out very well without sticking to the pan.
Take 1 laddle of the dosa batter. After the dosa pan is heated for a while, pour the batter and swirl to make a circle. Let the dosa be very thin and crisp. Crispy dosas taste great when filled with masala.
Cook in medium flame. Once it is done on one side, flip it to other side. Cook on low flame and remove from stove. Keep the masala filling in the center of the dosa and fold.
Serve hot with chutney of your choice.

Tuesday, August 16, 2011

Chilli Spiced Methi Paratha

I love fresh methi leaves as they have great nutritional value. Also the health benefits they provide is numerous. Every time I try to pick up one here, but wonder what to prepare and walk away! This time we are having paratha mania @ our home. So thought it would be great to prepare Methi Paratha. And here comes our Spiced Methi Paratha...
I checked out many recipes online and a couple of cookbooks have. There are two ways to make methi paratha:
Either
Make a spiced stuffing like we do for our gobi paratha and make methi parathas the same way.
Or
Chop up the leaves and add them to the atta while making the dough and make parathas as normal. This is very simple and does not have any added taste.
We want to make something tasty yet simple.

You need
fresh methi / fenugreek leaves, cleaned and chopped fine - 4 cups (it needs to be washed in cold water, preferably 2-3 times to avoid any sand in it)
green chillies, chopped fine - 2
ginger, grated - 1 inch
powdered jeera / cumin seeds - 1 tspn
oil - 1 tsp
Salt to taste
atta / wheat flour - 5 cups
Water as needed
Ghee or butter to make the parathas
Heat the oil and add the cumin seeds. After 5 seconds, add the ginger, green chillies and some salt finally the methi leaves. Stir until the leaves start to wilt and get lightly toasted. Don't cook it for more than 5 mins. Let this mixture cool.
Add the spiced methi mixture to the atta, and add little more salt and enough water to make a soft, pliable dough. Divide into 6 equal-sized balls. Roll out each and cook on a tawa or griddle until both sides are golden brown.
After removing from fire, pat ghee or butter on both side and keep covered to maintain softness.
( I use oil instead of butter)
Serve with Yogurt dip.

Benefits of Fenugreek

Use a lot of fenugreek (methi) in your culinary preparations. They are so healthy and so appetizing, light and dry.

They are rich in protein, calcium, phosphorus, and iron in their natural form. The vitamin contents are also very high and is easily assimilated by our body. The long term use reduces deposits of fat in the body and lowers cholestrol. It has exceptional medicinal used and can be used as beauty aid.

Tuesday, August 9, 2011

Puliogare

Puliogare is all time favorite variety rice for almost all of us. Each of us have our style of preparing. And every recipe tastes great only for this type of rice. Just the combination of chilli with tamarind paste and seasoned with salt tastes great. Other additions to it make it just wonderful, and sometimes wonderful for many days to store them!

You need
4 tsp Puliyogare paste with the oil (recipe follows)
1 tsp roasted coriander powder
1/4 tsp roasted fenugreek seeds
few curry leaves
1/4 cup roasted peanuts
Then to it add the powdered mixture, roasted pea nuts, roasted curry leaves and roasted cashews(optional). Check for salt and add if required. Serve this with nice Sabudana vadam or papad or even potato chips goes great with it.
This can be served with cucumber raita. Chop a cucumber and to it add a cup of yogurt. Tamper Mustard seeds with a spoon of oil and add to the raita. Season with salt and serve with Tamarind rice.

For Puliyogare paste
You need
1 Big lemon size tamarind
10-15 dry red chilies powdered
2 cups water
1/2 cup sesame oil
1/2 tsp turmeric powder
For Tampering
1/2 tsp Mustard seeds
1 tsp Urad dhal
11/2 tsp Channa dhal
2 tsp oil
few curry leaves


Tamper the mustard and then add the dhal and saute till golden brown. Add the curry leaves - very little. As I always store the Puliyogare for more days. To this add the tamarind, turmeric powder and powdered red chillies. Add water and let cook for about an hour or until the raw taste goes off. While cooking slowly add the sesame oil. Add the oil little by little. If you do not intend to store the puliyogare for more days, then you can reduce the amount of oil.
Cool it and store in an air tight container for 1 month or two


Related Posts Plugin for WordPress, Blogger...